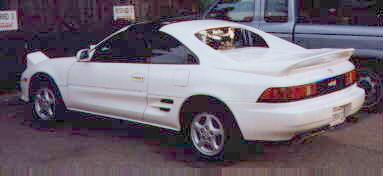
Before
WARNING: This
page is meant to be a guideline only. Individual experiences vary. Any time
you work on a car, you risk damaging it...if you damage your car, don't blame
me, ok?! ;>
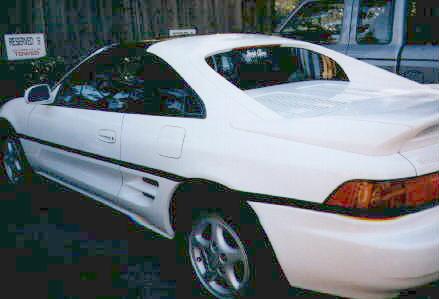
Before
(the door piece isn't installed in the above picture)
|
Tools Needed:
Instructions - Removal There are a total of SIX trim pieces per side. The order of the following instructions will be starting with the front-most trim piece first, working your way towards the rear. Piece 1: Held in place with one screw, one nut. To access screw, remove front turn signal refelctor lens on side, the wraparound part. It's supposed to just pry out; see your owner's manual. I ran into difficulty with it and ending up removing BOTH turn signal piecs. Well anyway, remove the cover, and you'll see the screw...so unscrew it! :) Now, there's a nut on the back side (use a 10mm socket). To access this nut, raise the headlights and leave them up; remove the wraparound trim (black) as if you were going to change the headlight. Now, if you have skinny arms, you can reach down in there with the rachet and remove the nut. You may find it easier to remove the headlight first. Another approach would be to remove the cover on the bottom of the car and get to the nut that way. Piece 2: the short piece right behind the rectangular side marker light (US model) - this is actually part of the side marker light so you'll be removing both as a set. They're held in place with two nuts behind. Remove the first nut following the above procedure. For the second nut, I found it easier to get to it by removing the trim inside the wheel well, or just pushing a little bit of it back. Piece 3: One press-in screw, plus adhesive. Pry the press-in screw out. Pull the strip off, that's all. Be careful not to BEND the strip much as you pull it...pull it at roughly a 45 degree angle to the direction of the car...so you're kinda pulling it fowards as well as away from the car. A 3/4" putty knife might help out here. Piece 4: door piece...held on with adhesive ONLY. Use the 3/4" putty knife to break through the adhesive foam on either end, and gently pull the piece off. Piece 5: above the air scoop, the hardest of them all: 3 nuts and one screw. You can remove two of the nuts from inside the rear wheel well. To get to the third nut, remove the side panel inside the car. Look/feel behing the seatbelt mechanism; there's a large 3" diameter hole in the sheetmetal wall with a stud poking out of it; use the 10mm deepwell socket here to remove the nut; use the magnetic pickup tool to pull the nut out of there...don't drop it, I don't think it'll be possible to retreive it! The screw is easy to remove, I think you can figure that one out yourself... ;> Piece 6: one screw, two(?) nuts. Remove screw. One nut is accessible from the wheel well; the other is accesible by pulling back the carpet in the trunk. Actually, I think there are TWO per side in the trunk I don't remember for sure...either way, it's easy! You'll have to remove the taillights too to get the trim out - to do this, open the trunk, remove the two black screws holding each taillight in, then use a flathead screwdrive to pry off the triangle shaped side lens; remove the two phillips screws that are now exposed; the taillights should just pop off. To remove the adhesive from the car (where applicable), use the razor blade scraper with a NEW razor blade, and scrape it off. Use vertical strokes, from bottom to top, a little bit at a time. I found that it didin't take it all off the first time so I basically did it twice. I nicked the paint in a couple places (though it's hidden by the trim!): a sharp razor blade will not scratch your paint. Just keep the angle of attack low, so to speak. I tried chemicals to remove the adhesive, but nothing really worked...and the razor blade method was EASY and FAST. Painting Instructions: There are MANY different ways you can do this..best bet is probably to have a body shop paint them for you. You could also use the automotive touchup paint in spray cans; I've seen some that's color matched to Toyota paint codes, including 041 (though mine's a 043). I chose a high quality outdoor spray paint from a hardware store; the shade of white is very close to my car though not a perfect match. Actually, I first used some fine scouring pads (you can use fine steel wool if you like too) to remove wax and scuff up the surface a bit to help the paint stick. Then I sprayed them with a coat of primer and let dry; then a couple coats of paint (make SURE you paint the edges well; they ARE visible when the trim is installed!). I topped it off with a clearcoat, in the form of a clear acrylic spray can found at Orchard Supply Hardware. A coat of wax, and they were ready to reinstall! To reinstall the pieces that were glued on, I used a type of adhesive foam with an adhesive known as "VHB", made by Scotch/3M. |